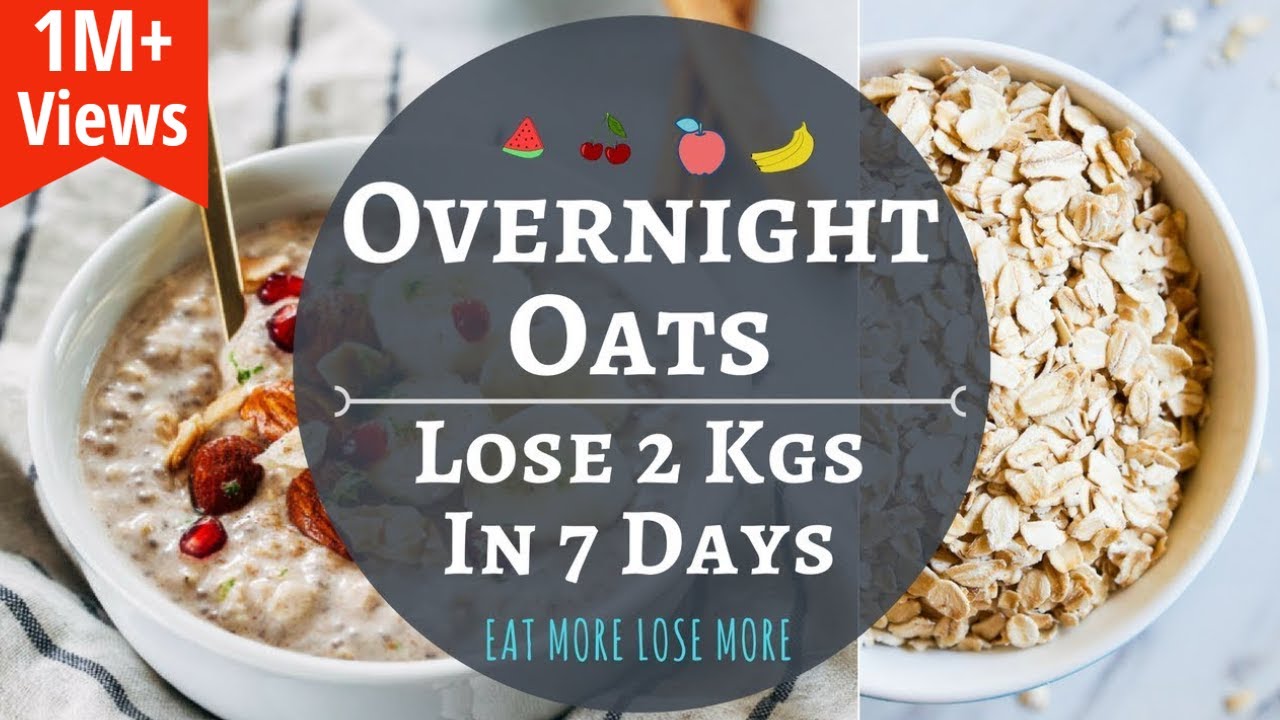
Mastering Overnight Oats: Easy Steps for a Healthy Breakfast
In the quest for a breakfast that’s both nourishing and effortless, overnight oats have emerged as a true game-changer. Imagine waking up to a delicious, ready-made meal that requires zero cooking – just grab it from the fridge and enjoy. This ingenious breakfast solution, often hailed as the ultimate meal prep staple, is not only incredibly convenient but also packed with health benefits. If you're wondering
how to make overnight oats that are perfectly creamy, flavourful, and satisfying every time, you’ve come to the right place. Whether you're a complete novice or a seasoned fan looking to refine your technique, this comprehensive guide will walk you through everything you need to know to master this delightful morning meal.
Overnight oats are more than just a trend; they’re a lifestyle hack for anyone seeking a healthy start to their day without the morning rush. They’re high in fibre, promoting digestive health and sustained energy, and can be easily boosted with protein to keep you feeling full and focused. The beauty lies in their simplicity: combine oats, liquid, and your favourite add-ins, refrigerate overnight, and voilà – breakfast is served! Forget standing over a hot stove; with overnight oats, a good night’s sleep is all the "cooking" you’ll need.
What Exactly Are Overnight Oats? The No-Cook Breakfast Revolution
At its core, overnight oatmeal is simply raw rolled oats that have been soaked in a liquid, typically milk or a plant-based alternative, and refrigerated for several hours, usually overnight. Unlike traditional oatmeal which is cooked on a stovetop or in a microwave, overnight oats absorb the liquid as they sit, softening to a creamy, palatable texture without any heat. This process not only makes them incredibly convenient but also preserves many of the oats' beneficial nutrients that might be slightly diminished by cooking.
The magic happens while you sleep. As the oats soak, they undergo a process where their starches swell and break down, making them easier to digest. This results in a thick, pudding-like consistency that is ready to eat straight from the fridge. They can be enjoyed cold, or gently warmed if you prefer, offering ultimate flexibility. This "set it and forget it" approach makes them an ideal choice for busy individuals, students, or anyone looking to streamline their morning routine while still prioritizing a wholesome breakfast.
The Foundation: Essential Ingredients and the Perfect Ratio
The success of your overnight oats hinges on two primary ingredients: the right type of oats and the appropriate liquid, combined in the correct ratio. Understanding these elements is key to achieving that perfect texture and flavour profile.
Choosing Your Oats:
- Old-Fashioned Rolled Oats: These are the undisputed champions for overnight oats. Their larger, flatter flakes absorb liquid beautifully, resulting in a chewy yet creamy texture that holds up well without becoming mushy. They offer the best balance of structure and softness.
- Quick Oats: While not our top recommendation, quick oats can be used. They are cut into smaller pieces and steamed longer than rolled oats, making them more absorbent and softer faster. This means your overnight oats will have a slightly softer, almost mushy texture, but they are still a delicious option if you prefer that consistency or are in a pinch.
- Instant Oatmeal: We generally advise against using instant oatmeal for overnight oats. These are highly processed and designed for extremely fast cooking, leading to a very mushy texture when soaked overnight. The flavour and structural integrity are typically compromised.
- Steel-Cut Oats: These are whole oat groats sliced into smaller pieces. They are very dense and fibrous, making them unsuitable for traditional overnight oats as they do not soften adequately with cold soaking alone. Unless you are pre-cooking or pre-soaking them for an extended period (24+ hours with water changes), skip them for this application.
Selecting Your Liquid:
The liquid component is crucial for both hydration and flavour. The classic ratio is usually
1 part oats to 1 part liquid, but this can vary significantly based on your chosen liquid and any additional mix-ins.
- Dairy Milk: Whole, skim, or low-fat dairy milk provides a rich, creamy base and adds protein.
- Plant-Based Milks: Almond, oat, soy, coconut, or cashew milk are all excellent choices. Each imparts a subtle flavour difference – oat milk often provides an extra creamy consistency, while almond milk offers a lighter option.
- Water: Yes, you can use water, but it will result in a less creamy texture and a blander taste. If using water, compensate by adding more flavourful ingredients like fruit, spices, or a touch of sweetness.
- Juice: Fruit juices like apple or orange can add sweetness and flavour, but be mindful of the added sugar content. They might also absorb differently due to their viscosity.
- Protein Shakes: For an extra protein boost, using a pre-made protein shake as your liquid can be a smart move, just be aware of how the flavour might interact with your other ingredients.
It's important to note that certain additions like chia seeds, yogurt, or protein powder are highly absorbent and will require you to adjust your liquid ratio upwards to prevent overly thick or dry oats. For a deeper dive into perfecting your ratios and avoiding common mistakes, check out our guide on
Overnight Oats Ratio: Choosing Oats, Liquids & Avoiding Mistakes.
Step-by-Step Guide: How to Make Overnight Oats Like a Pro
Making overnight oats is incredibly simple, requiring minimal effort and no special equipment. Here’s a basic step-by-step recipe that forms the foundation for countless variations:
- Gather Your Container: Choose a sealable jar (like a Mason jar), a small food container with a lid, or even a deep bowl covered with plastic wrap. A ½ cup capacity is perfect for a single serving.
- Add Your Oats: Measure ½ cup of old-fashioned rolled oats into your chosen container.
- Pour in the Liquid: Add ½ cup of your preferred liquid (e.g., milk, almond milk, oat milk). This maintains the essential 1:1 oats-to-liquid ratio for the base.
- Include Essential Add-ins (Optional but Recommended): This is where you can start building flavour and texture. A pinch of salt enhances all flavours, a tablespoon of chia seeds adds thickness and omega-3s (remember to slightly increase liquid if using), and a teaspoon of sweetener like maple syrup or honey can be added now.
- Stir Thoroughly: Use a spoon to mix all ingredients well. Ensure that the oats are fully submerged in the liquid and there are no dry pockets at the bottom. This prevents uneven soaking.
- Seal and Refrigerate: Securely place the lid on your container. Transfer it to the refrigerator and let it soak for a minimum of 4-6 hours, but ideally overnight (8 hours or more) for the best texture and flavour development.
- Enjoy! The next morning, open your container, give it a quick stir, and enjoy your perfectly prepared overnight oats. You can eat them cold, or microwave them for 30-60 seconds if you prefer them warm.
Unleash Your Creativity: Customizing Your Overnight Oats
Once you’ve mastered the basic recipe, the world of overnight oats truly opens up. Their versatility is one of their greatest strengths, allowing you to customize them to your exact preferences, dietary needs, and cravings. This makes them a perfect vehicle for culinary experimentation and an excellent choice for meal prepping a variety of breakfasts throughout the week. For more on how to seamlessly integrate them into your weekly meal planning, check out
Overnight Oats: Your Go-To Meal Prep for Easy Healthy Breakfasts.
Sweeteners:
Adjust the sweetness to your liking. Options include maple syrup, honey, agave nectar, brown sugar, stevia, or ripe mashed banana.
Spices and Extracts:
A dash of cinnamon, nutmeg, cardamom, or pumpkin pie spice can transform your oats. Vanilla extract is also a popular choice for an underlying warmth.
Fruits:
Fresh fruits like berries, sliced banana, diced mango, or chopped apples can be added either the night before (soft fruits like berries or banana work well) or in the morning for maximum freshness and crunch. Dried fruits like raisins, cranberries, or chopped dates add natural sweetness and chewiness.
Nut and Seed Powerhouses:
Boost the nutritional profile with a spoonful of chia seeds, flax seeds, hemp seeds, or pumpkin seeds. These add healthy fats, fibre, and protein. A dollop of peanut butter, almond butter, or cashew butter stirred in offers richness and a protein kick.
Protein Boosts:
For a more filling breakfast, consider adding a scoop of your favourite protein powder (you may need to increase liquid slightly), a spoonful of Greek yogurt or skyr (adds creaminess and tang), or even cottage cheese.
Texture and Crunch:
For a delightful contrast, add toppings just before serving. Granola, toasted nuts, shredded coconut, or a sprinkling of chocolate chips can elevate your overnight oats from simple to café-worthy.
Tips for Success and Common Mistakes to Avoid
Even though making overnight oats is simple, a few tips can help you achieve perfection every time and avoid common pitfalls:
*
Don't Forget to Stir: After adding all your ingredients, give them a good stir. This ensures the oats are fully coated and submerged, preventing dry patches and promoting even absorption.
*
Adjust Consistency to Your Liking: If your oats are too thick in the morning, simply stir in a splash more liquid until you reach your desired consistency. If they're too thin, next time reduce the liquid slightly or add a bit more chia seeds or oats.
*
Storage is Key: Always store your overnight oats in an airtight container in the refrigerator. This keeps them fresh and prevents them from absorbing fridge odors. They typically last for 3-5 days, making them perfect for batch meal prepping.
*
Add Toppings Just Before Serving: While some mix-ins can go in the night before, fresh fruits, nuts, granola, and sauces are best added in the morning. This maintains their texture, prevents sogginess, and keeps ingredients like bananas from browning.
*
Consider Temperature: Overnight oats are traditionally eaten cold. However, if you prefer them warm, simply microwave them for 30-60 seconds, stirring halfway through, until heated to your preference. Be mindful not to overheat, as this can change the texture.
Conclusion
Mastering the art of overnight oats is a simple yet powerful step towards a healthier, more convenient breakfast routine. With just a few basic ingredients and a little foresight, you can transform your mornings, freeing up precious time and nourishing your body with a fibre-rich, customizable meal. From understanding the best types of oats and liquids to exploring endless flavour combinations, you now have all the tools to create your perfect bowl. So go ahead, experiment, customize, and discover the joy of waking up to a delicious, healthy breakfast that practically makes itself. Your future self will thank you!